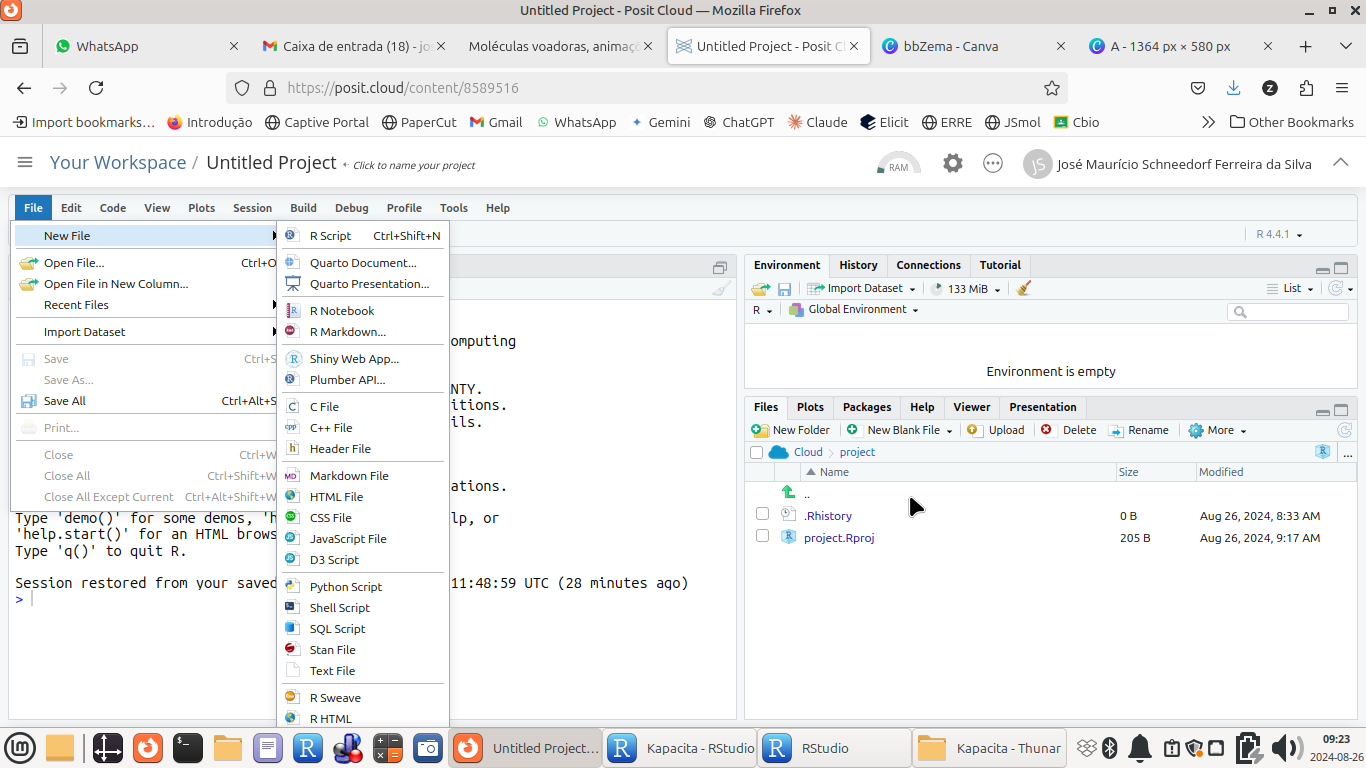
File --> New File --> RScript...

or by shortcut: Ctrl + Shift + N2 - Basic R commands
Objectives:
1. Understand the purpose of the windows and tabs in RStudio
2. Understand the logic of R commands and attributes
3. Use commands by script
R is a command line program. This is a bit tedious, as we have already seen, because any mistake in typing a command results in the code reading being interrupted. But on the other hand, and also as we have already seen, chained and commented command lines allow the reproduction and modification of code snippets converging to any product, in this case, educational objects for high school, and without the need to memorize mouse clicks and technical operations.
Unlike Jmol, however,
R is quite strict in its syntax, and it is not possible to mix upper and lower case letters, or singular and plural forms. For the code to work, it must be typed correctly. But you can easily increase or reduce the space between commands, which makes no difference to the R compiler.Some operations are performed alternatively by mouse, command line, or both, depending on the action. Below are some basic features for reproducing code for educational objects, without detailed descriptions of the R & RStudio operation itself, to simplify and make this work more objective.
If you would like to learn more about both programs, either the installed or cloud version, we suggest the numerous websites and tutorials available on the internet, as well as hundreds of books already written on the subject, and online courses on various teaching platforms.
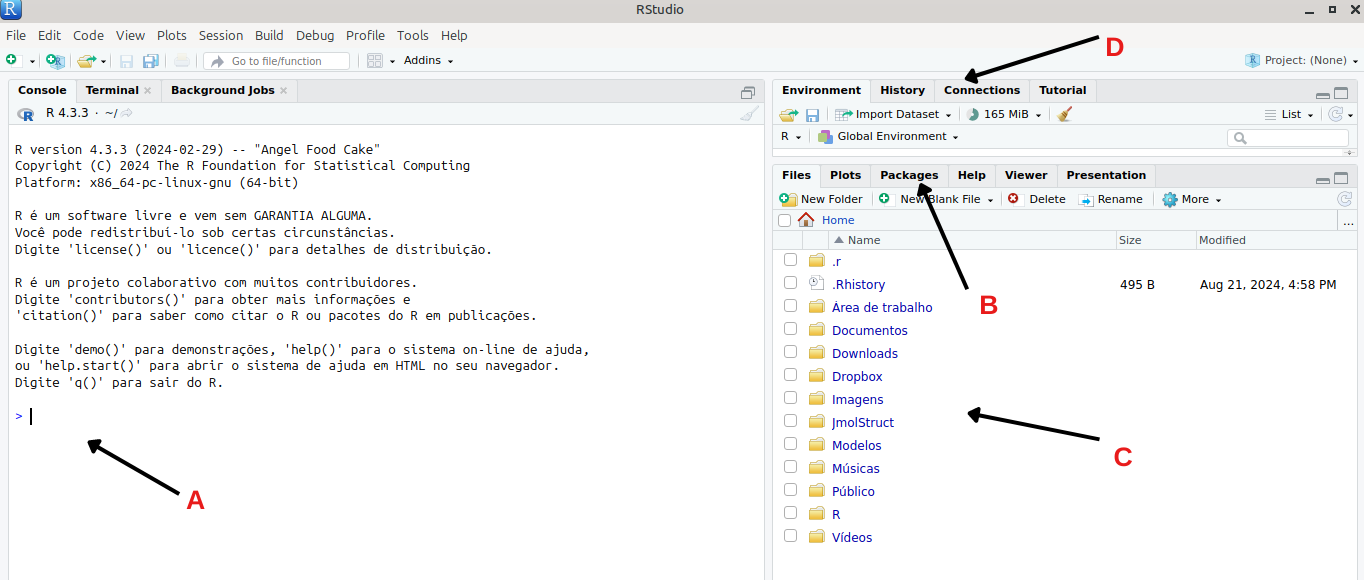
1 An overview of the RStudio interface
| Rstudio does nothing more than provide a graphical user interface (GUI) for R, which is a program executed by its own code language, similar to Jmol. Several operations can also be performed without commands or code, such as opening and saving a file, or viewing and saving a graph, for example. Let’s take a look at the main window of Rstudio.
For our work, however, an additional area will be useful, the script area, which can be accessed as follows:
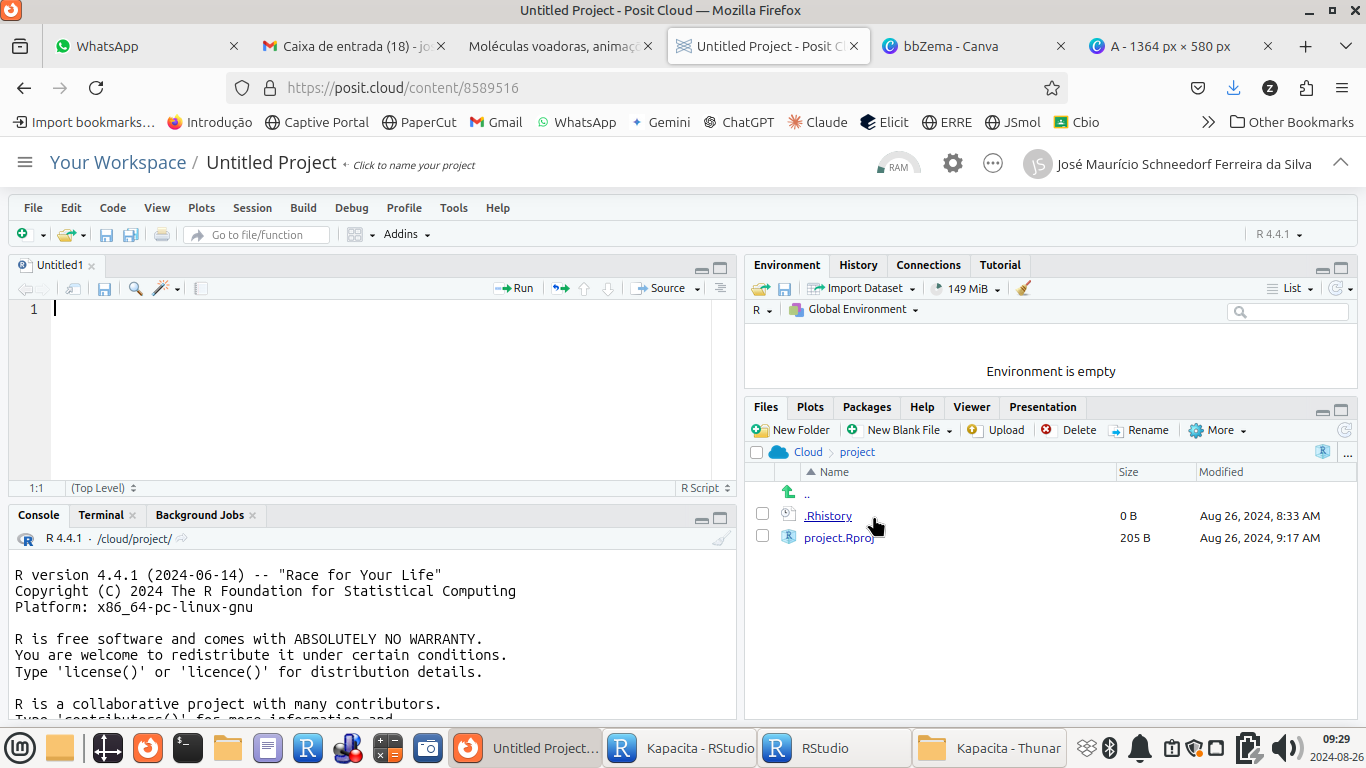
Note that the main window has now been divided into two parts, including the new tab for scripts.
2 How commands work in R
All commands in
R consist of a name followed by arguments, enclosed in parentheses. Here are some examplescommand(argument 1, argument 2, argument 3, ...)
Examples:
plot(x,y)
mean(z)
read.csv(file = "my.data.csv")
3 Creating a script in R
To produce a script in
R, the best way is to write the command lines in a similar way to what was done with the 3D molecular viewer Jmol in its Console, separating them by individual lines. Here is an example of a simple calculation:x = 5
x^2 +7[1] 32
To run the script above, simply copy and paste it into the open script area. Here’s a golden tip. Notice that in the upper right corner of the script there is a paste icon for the script text. Just click on this icon and the text will be copied.
Now just paste it into the open script tab (in the cloud, for example) and execute it as follows.
4 Executing a script in R
There are a few ways to execute a script, as in the example above, in
R. Here are the most common ones:1. If you want to execute a few lines of a *script*, you can select the lines and click Ctrl + Enter ;
2. If you want to execute the entire *script*, select all the text (Ctrl + A) followed by the above action, Ctrl + Enter ;
Optionally, you can click on the "-->Source" icon ;
3. If you want to execute only one line, just click on the line followed by Ctrl + Enter ;
Optionally, you can click on the "-->Run" icon ;
Now it’s up to you:
From the script run and transcribed below:
x = 5
x^2 +7
Modify the second command line to calculate “x” using other operations. Suggestions:
sqrt(x); square root
log10(x); base 10 logarithm
sin(x); sine
5 Some recommendations for typing in an R script:
There are some basic assumptions for an
R script to be read clearly by its developer, as well as compiled correctly by the program:- Typing: whenever there is an error in the script in Rstudio, a red cross will appear on the left side of the command line; once the error is corrected, the sign disappears;
- Comments: so that the script can also be read by a human being, it is advisable to add comments to the command lines (starting with #) - one of the basics of Reproducible Teaching;
- Indentation: allow “indentation” when the line is a little long by clicking the Enter key after a separation of arguments by “comma”. This way, the line continues just below, but with a small shift to the right. This makes the code easier to read.
- Names:
Rcommands are in English. Therefore, you should avoid using variables and file names with accents or graphic symbols in Portuguese (e.g., ç, ~). In addition,Ris a code compiler. If you define a compound name for a file or variable, i.e., with a space between the terms (as is normal in everyday language, e.g., my file),Rwill try to execute the terms separately (e.g., “my” and then “file”), which will cause the reading to be interrupted and an error message to appear. Therefore, for variable and file names, give preference to one of the three types of common conventions used in programming, namely:
- separation by underline, ” _ “ or hyphen; e.g.: my_variable, my-variable
- separation by capital letters; e.g.: myVariable
- separation by dots; e.g.: my.variable